

Here are the KAZZ Engineering E46 Lower Control Arm CONVERSION Bushings!
This unique product has been developed by KAZZ Engineering to allow enthusiasts to use E30 and E36 steel style control arms on their E46 chassis.
About the material…
I am proud to say that this product is made in house (Brisbane, Australia) with our unique D60 Polyurethane material. This semi-rigid material has been proven to provide the best durability and performance for you E46! The material properties allow for superior steering response and alignment control while still being able to absorb noises and harshness’ – accommodating for both comfort and performance – this material is the perfect all rounder! We recommend this material for all road and track applications.
About the conversion bushings…
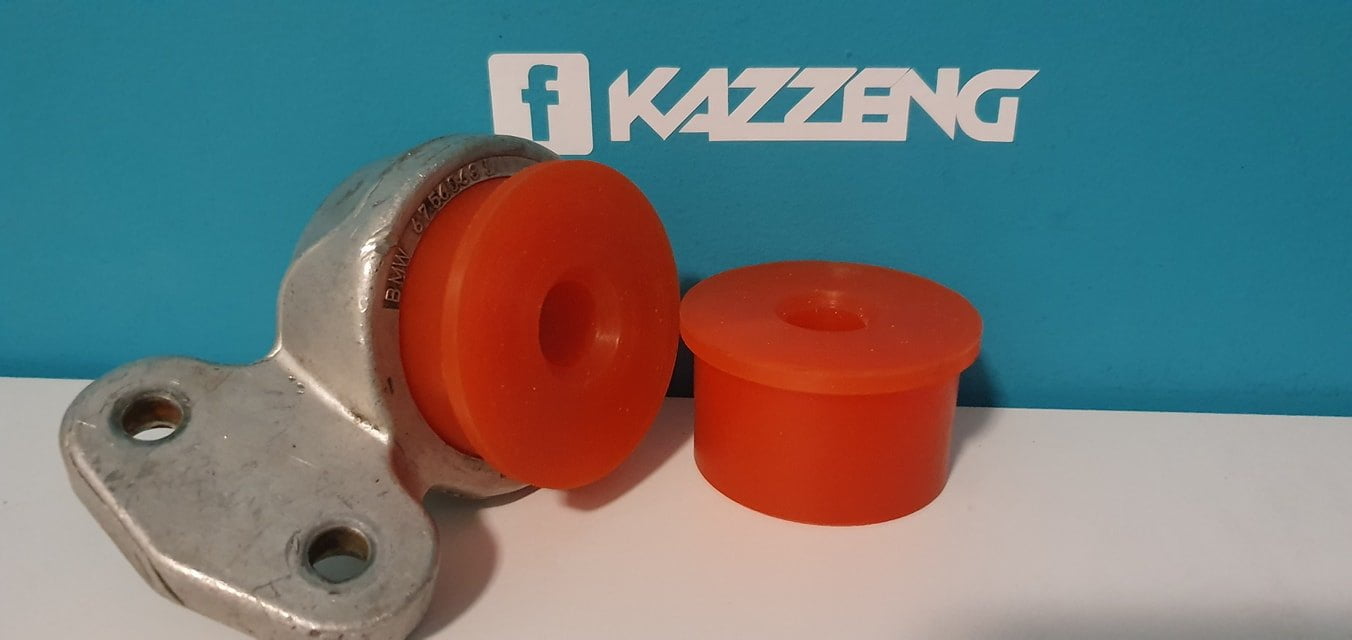
These bushings are necessary for anyone using E30 or E36 control arms (including our KAZZENG extended LCA’s) on their E46 chassis. Noting that the shank on the E30 and E36 control arms is a round 20mm pin; you can not use standard E46 bushings because they are designed to accommodate the 22mm hex found on E46 control arms. However, E30 or E36 bushings can not be used either because they are 60mm in diameter while the E46 ‘lollipop’ bracket has an inner diameter of 66mm and requires a larger bushing.
This is where our solution comes in; a bushing designed with the correct diameter to fit in the E46 bracket but with a bore of 20mm to perfectly accommodate for your E30 or E36 control arms. Again, this is required when purchasing the KAZZ extended arms.
About centred lower control arm bushings…
The centred option allows you to retain your cars original suspension geometry while improving steering response and alignment control. Thanks to the polyurethane material – you will experience sharper steering and can have peace of mind knowing that the durable polyurethane material will not wear and perish like the rubber OEM alternative. We recommend centred bushings for our Extended KAZZ Engineering Control Arms because the control arms are already designed with +2 degrees of added castor.
Install tips…
1) We strongly recommend all products are installed by a qualified mechanic.
2) Assuming you are replacing OEM rubber bushings – the hardest part of the install is removing the old bushings. The best way to remove the old bushings is with a press and a round 65mm press tool. Failing this; you can cut the OEM bushing out. Start by removing the centre and then make a single cut along the inner face of the metal shell and then pry this piece out.
3) The KAZZ Engineering bushings are unique and are designed to be designed easily without the need for any speciality tools. The geometry of the bushings feature a stepped diameter. This means you can easily push the first 20% of the bushing inside the housing. This allows you to easily get the bushing orientated and ‘in there’. At this point the diameter is increased for a tight interference fit. You can now press the rest of the bushing into the housing and then fit onto your control arms.
4) We recommend bushing lubricant on the bushing’s inner hole where the control arm is fitted.
5) When re-installing the control arm – be sure to fit the inner ball joint first and then locate the ‘lollipop’ bracket.
6) Aligning the ‘lollipop’ bracket to the chassis’ mounting position is a common struggle for the DIYer. This can be made easier with the help of a narrow screwdriver. With the control arm mounted to the subframe (as per tip 4), fit the screwdriver through one of the holes on the bracket and also into the corresponding mounting hole on the chassis. This will force the correct path for the bracket to follow as you push the bracket towards the chassis. Once you have the counterbored hole of the lollipop bracket over the mounting dowel on the chassis you will be able to thread in the first mounting bolt. Remove the screw driver and install the second mounting bolt. Torque both bolts to 40Nm.


Reviews
There are no reviews yet.